The Why and How of Image Optimization Featured.jpg

The Why and How of Image Optimization

Whether you’re building your own website with the Websites 360® website builder or you’re working with a designer who can do it for you, you need to learn why and how to optimize your images. But before we go into why image optimization is important and how to go about doing it, let’s talk about what it is.

There are two main aspects of image optimization. The first involves resizing images while maintaining quality, and the second involves optimizing the image for search engines with relevant keywords.

imageoptimization.jpg

Why is image optimization important?

  • Page speed - Large, unoptimized images can make your website slow and clunky like nothing else. Your users won’t wait around for your website to load, and optimizing your images will go a long way toward ensuring that it loads quickly.
  • User experience - When your website takes forever to load, it doesn’t exactly provide the best experience for your users. Your users expect your site to load quickly. Optimizing your images helps to ensure a better user experience and that you meet users' expectations.
  • SEO - Image optimization will help to ensure that your images rank in image searches on Google, and it will also be beneficial to the overall SEO (search engine optimization) of your website. Additionally, page speed plays an important part of Google’s search algorithm, and image optimization will help you avoid the organic search penalties of having a slow website.
image_optimization.jpg

How to optimize the images on your website

#1. Choose the right image file type

When you’ve created an image, you have to choose a file type to save it as. There are many different options to choose from; here are a few of the most common:

  • JPEG - JPEGs will work for most of the images on your site, with the exception of any images that have a transparent background. JPEGs are ideal because they allow for higher quality images and smaller file sizes, but fall short when it comes to things like logos or line drawings. With JPEGs, some file data may be lost in compression; although, the loss is not typically noticeable.
  • PNG - When images don’t have a lot of color, are transparent or have a lot of text, PNGs are ideal. PNGs, however, will require larger file sizes.
  • GIF - GIFs can compress images into smaller file sizes, much like JPEGs, but the color range on GIFs is limited, making it a poor choice for most photography. However, GIFs can be great for animation.
  • TIFF - In terms of quality, TIFFs are king. However, it comes at the cost of size, as they are uncompressed and therefore much, much larger.
  • WebP - WebP is a relatively new image format that offers both smaller file sizes and higher quality than JPEGs.
  • AVIF - AVIF is a new image format that is similar to WebP but with better compression, meaning it can offer even smaller file sizes at the same level of quality.
how_to_optimize_images.png

#2. Use a keyword to name your images

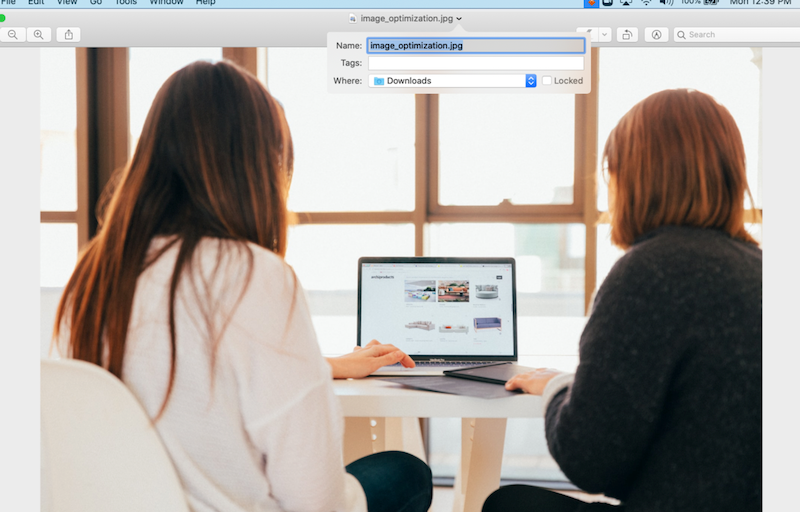
Most people don’t give a second thought to what the file names for their images are, but it turns out that it matters a lot more than you might think.

Did you know that Google will actually crawl the file names of your images? Make the names of your images descriptive and keyword-rich (but not spammy!).

If you leave the default image name — dsc1938473.jpg, for example — it’s a missed SEO opportunity. Instead, if the image is of a pair of women’s shoes, for example, choose something like pink-platform-shoes.jpg.

#3. Resize your images

Large images can slow your website down like crazy, and what’s more is that it's entirely unnecessary to have an image that’s larger than the maximum size your site will allow for. And, since most people won’t wait longer than three seconds for a website to load, site speed is of the utmost importance.

Resizing and compressing — which reduces the file size while preserving the quality of the image — your images will prevent them from slowing your site down.

alt-image-tags.png

#4. Optimize the alt image tags

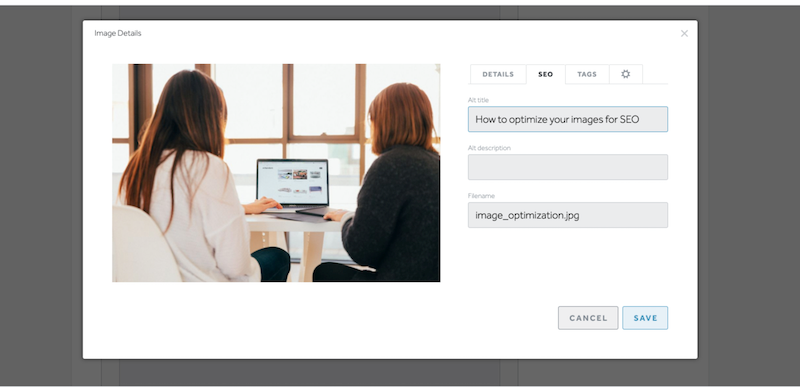
The alt image tags, also called the alt attributes, are the text alternative to images when they fail to load on your website, but otherwise, they do not appear on your website.

Alt image tags used to tell people who have visual impairments what your images are, and they’re used by search engines to determine ranking in image searches, as well as a website’s organic ranking as a whole.

Suffice it to say, optimizing alt image tags is important. Here are a few rules to keep in mind to help you get it right:

  • Use plain, descriptive language in your alt image tags, much like when you renamed the image file
  • If the image is of a product with a serial number or model number, include it in the alt image tag
  • If you can do so naturally, include a relevant keyword in your alt image tag. But, don’t force or overly stuff keywords into your tags

#5. Use decorative images wisely

Decorative images are images that are solely used for aesthetics and don’t add any understanding of the page or the content; think background images, borders, spacers, etc.

Although these images can make your website look a whole lot better looking, they can also make it a whole lot slower if you’re not careful.

Make sure that you always check and minimize the file size for all of the decorative images on your website. Background images, especially, look great but can have large file sizes.

Compress these images as much as possible without sacrificing quality. You could also minimize the size of a background image by cutting out the middle and making it transparent or a flat color.

Never add alt attributes to the decorative images on your website. Believe it or not, there is such a thing as over-optimization, and search engines could penalize you for it.

Images are a key part of web design, but creating great images is only the first step. You also have to optimize them, and I hope this blog can be a resource for you in doing so!

Start building your website with Websites 360 today!

Originally published 2/27/20